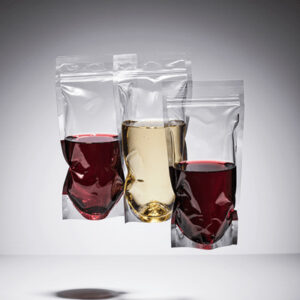
Vacuum sealing is one of the most effective ways to preserve food, reduce waste, and keep ingredients fresh for longer. However, sealing liquids such as soups, sauces, marinades, and stews can be tricky. If done incorrectly, liquids can get sucked into the vacuum sealer, damaging the machine and ruining your seal. Fortunately, with the right techniques and tools, you can safely and effectively vacuum seal liquids for storage or sous vide cooking. 1. Why Vacuum Seal Liquids? Vacuum sealing liquids offers several benefits: Extended shelf life: Removing air slows down oxidation and prevents spoilage. Better flavor preservation: Liquids like marinades and sauces retain their taste and texture longer. Perfect for sous vide cooking: Vacuum-sealed liquids heat evenly in water baths. Space saving: Sealed pouches take up less room in the freezer or fridge than bulky containers. But since liquids can be pulled into the sealing chamber during suction, you need a controlled approach to avoid mess and equipment damage. 2. Method 1: Pre-Freeze the Liquid The most common and reliable way to vacuum-seal liquids is by freezing them first. Steps: Cool your liquid completely. Never try to vacuum-seal hot or warm liquids; this can cause steam and expansion. Pre-freeze in a container or bag. Pour the liquid into a plastic container or zip bag and freeze until it’s solid or slushy. Transfer to a vacuum sealer bag. Once frozen, place the solidified liquid in your vacuum sealer bag. Seal normally. Since the liquid is frozen, it won’t get sucked into the machine. Label and store. Always note the contents and date before storing for long-term freezing. Best for: Soups, stocks, stews, smoothies, and sauces you plan to freeze for later use. 3. Method 2: Use the “Stop and Seal” Technique If your vacuum sealer doesn’t have a liquid mode, you can manually control the process. Steps: Pour the cooled liquid into a bag, leaving at least 3 inches of space at the top. Start the vacuum cycle and watch closely as air is removed. As soon as the liquid begins to rise toward the seal bar, press “seal” or “stop.” The machine will seal the bag before liquid escapes. This method requires attention, but it works well for smaller batches of liquid or semi-liquid foods like chili or sauces. 4. Method 3: Use a Chamber Vacuum Sealer For those who frequently seal liquids, a chamber vacuum sealer is the best investment. Unlike standard external sealers, chamber machines equalize pressure inside and outside the bag, which prevents liquids from being sucked out. Steps: Place your liquid-filled bag (leaving some headspace) inside the chamber. Set the vacuum and seal time according to the machine’s manual. Start the cycle—the vacuum removes air evenly without disturbing the liquid. Remove, label, and refrigerate or freeze. Chamber sealers are ideal for restaurants or serious home cooks who seal broths, soups, or marinades often. 5. Method 4: Use a Mason Jar Attachment If you’re sealing liquids for short-term storage, using a vacuum sealer jar attachment is another safe option. Steps: Pour your liquid into a canning jar, leaving about 1 inch of space. Attach the vacuum sealer jar adapter to the lid. Activate the vacuum mode to remove air and create a tight seal. This is perfect for salad dressings, sauces, and marinades you plan to refrigerate rather than freeze. Key Tips for Success Always cool liquids before sealing. Avoid overfilling bags—leave room for sealing and expansion. Label bags clearly with contents and date. For long-term storage, use freezer-safe vacuum bags.

